
下面为官方内容,研究透下面的内容,不用再搜索任何其他资料了:) 记录下链接没啥用哈,搞清楚how和what之后才能变成自己的东西 developer apple center
Current
cocoapods环境配置
cocoapods执行完sudo gem install cocoapods 之后,命令后依然提示找不到pod命令。
本质是要找到pod可执行文件的位置:You can find out where a gem is installed with gem which cocoapods
$ gem which cocoapods
/Users/eloy/.gem/ruby/2.0.0/gems/cocoapods-0.29.0/lib/cocoapods.rb
$ /Users/eloy/.gem/ruby/2.0.0/bin/pod install
查看gem environment显示环境信息。
RubyGems Environment:
  - RUBYGEMS VERSION: 3.5.4
  - RUBY VERSION: 3.3.0 (2023-12-25 patchlevel 0) [arm64-darwin23]
  - INSTALLATION DIRECTORY: /opt/homebrew/lib/ruby/gems/3.3.0
  - USER INSTALLATION DIRECTORY: /Users/geb/.gem/ruby/3.3.0
  - RUBY EXECUTABLE: /opt/homebrew/opt/ruby/bin/ruby
  - GIT EXECUTABLE: /usr/bin/git
  - EXECUTABLE DIRECTORY: /opt/homebrew/lib/ruby/gems/3.3.0/bin
  - SPEC CACHE DIRECTORY: /Users/geb/.gem/specs
  - SYSTEM CONFIGURATION DIRECTORY: /opt/homebrew/Cellar/ruby/3.3.0/etc
  - RUBYGEMS PLATFORMS:
     - ruby
     - arm64-darwin-23
  - GEM PATHS:
     - /opt/homebrew/lib/ruby/gems/3.3.0
     - /Users/geb/.gem/ruby/3.3.0
     - /opt/homebrew/Cellar/ruby/3.3.0/lib/ruby/gems/3.3.0
  - GEM CONFIGURATION:
     - :update_sources => true
     - :verbose => true
     - :backtrace => false
     - :bulk_threshold => 1000
     - :sources => ["https://gems.ruby-china.com/"]
     - :concurrent_downloads => 8
  - REMOTE SOURCES:
     - https://gems.ruby-china.com/
  - SHELL PATH:
ios 17.0.3 无法验证app 需要互联网连接以验证是否信任开发者
同系统的其他几台设备连接正常,有一台一直报这个错误。udid确认已经添加到证书描述文件中。
- 退出登录的icloud账号(显示看的确有其他账号信息)
- 重启手机
不确定根本原因,上述操作之后app恢复正常。
添加登录后默认生效的环境变量
~/.bash_profile 和 ~/.zshrc默认开机加载
libimobiledevice
- libimobiledevice
ideviceinfo -u udid -k ProductType
get 1.3.1 on Mac from issue 1123
brew uninstall --ignore-dependencies libimobiledevice
brew uninstall --ignore-dependencies ideviceinstaller
brew uninstall --ignore-dependencies usbmuxd
brew uninstall --ignore-dependencies libplist
sudo rm /var/db/lockdown/*
brew install --HEAD libplist
brew install --HEAD usbmuxd
brew unlink usbmuxd
brew link usbmuxd
brew install --HEAD libimobiledevice
brew install --HEAD ideviceinstaller
ideviceinstaller
ideviceinstaller -u udid -llist installed packageslibusbmuxd
iproxy 2222:22
iOS 17 不再使用DeviceSupport文件
使用新的DDI(Device Driver Interface)机制与设备沟通。DeviceSupport的方式一直都是非官方方式(尽管已经正常运行了7年时间)—— 在低版本Xcode上指出高版本的iOS系统。后续各种依赖这个的工具可能都不好用了?go-ios, tidevice, or even idevice libs
官方论坛:Missing iOS 17 device support files官方讨论,其中提到的绕过方式满足特定条件可行SO:How to run on iOS 17 Device using Xcode 14
使用的新协议RemoteXPC,python项目pymobiledevice3做了对应的支持。
Starting at iOS 17.0, Apple introduced the new CoreDevice framework to work with iOS devices. This framework relies on the RemoteXPC protocol.
profile has not been expllicityly trusted by the user
wda编译安装成功,启动失败。提示无法启动。because it has an invalid code signature, inadequate entitlements or its profile …
使用的自定义签名证书和profile需要联网认证,手动点击启动应用时会自动弹出提示框。联网后会自动验证,不会有其他提示。
如果第一次点击还是无法自动激活,多尝试两次(也可以先把数据线断开)WDA可以正常打开表示已经完成激活。
codesign
- 报错:
errSecInternalComponent, ssh环境执行codesign时,无法使用证书导致这个报错 Resolving errSecInternalComponent errors during code signing
# 找到可用的证书文件
security find-identity -p codesigning

# unlock keychain, need to type password for login user
security unlock-keychain
# Single-quotes prevent the ! from being interpreted
security unlock-keychain  "=p" 'password!%' "/Users/my/Library/Keychains/login.keychain"
正确的使用逻辑可以参考wda-custom-server.md
private List<String> generateXcodebuildCmdline() {
    final List<String> result = new ArrayList<>();
    result.add(XCODEBUILD_EXECUTABLE.getAbsolutePath());
    result.add("clean build-for-testing test-without-building");
    result.add(String.format("-project %s", WDA_PROJECT.getAbsolutePath()));
    result.add(String.format("-scheme %s", WDA_SCHEME));
    result.add(String.format("-destination id=%s", deviceId));
    result.add(String.format("-configuration %s", WDA_CONFIGURATION));
    result.add(String.format("IPHONEOS_DEPLOYMENT_TARGET=%s", platformVersion));
    result.add(String.format("> %s 2>&1 &", XCODEBUILD_LOG.getAbsolutePath()));
    return result;
}

private static List<String> generateKeychainUnlockCmdlines() throws Exception {
    final List<String> result = new ArrayList<>();
    result.add(String.format("/usr/bin/security -v list-keychains -s %s", KEYCHAIN.getAbsolutePath()));
    result.add(String.format("/usr/bin/security -v unlock-keychain -p %s %s",
            KEYCHAIN_PASSWORD, KEYCHAIN.getAbsolutePath()));
    result.add(String.format("/usr/bin/security set-keychain-settings -t 3600 %s", KEYCHAIN.getAbsolutePath()));
    return result;
}
iOS重签名探索 –>ios_resign_with_ipa
ERR_SSL_PROTOCOL_ERROR
Mac上的各种浏览器访问Apple开发者网站时,提示证书错误。根据官方社区的反馈和本地环境判断:本地wifi环境的问题(因为safari上没有任何插件,依然报safari can't establish a secure connection to the server "developer.apple.com"),手机端使用本地wifi也无法打开相同的连接,切换到4G环境后可以正常访问。
隐藏dock栏图标‘
- 方法一:修改目标应用的程序包中的Info.plist,加入以下键值
<key>LSUIElement</key>
<true/>
不见得对所有App有效,可能造成程序起不来。
- terminal中使用
LSAppInfo
# hide
sudo lsappinfo setinfo -app XXX ApplicationType=UIElement
# show
sudo lsappinfo setinfo -app XXX ApplicationType=Foreground

# find xxx, the name of app.
lsappinfo | grep ") \""
屏幕分辨率
参考来源: https://www.ios-resolution.com/ 分辨率对应 https://blog.csdn.net/blog_jihq/article/details/80590767 设备型号对应
官方所有机型查看 https://www.apple.com.cn/iphone/compare/
修改terminal中的主机名
sudo scutil --set HostName xx
修改用户名和文件夹
- 新建管理员账号并登录
- 修改原/Users/user名称到修改后的名称
- 用户与帐户中:
Control+ 点击用户,打开高级选项,修改对应的帐户信息:包括名称、全名、文件夹目录(保持与上一步修改的一致) - 保存修改,重启电脑生效
brew macos 13 unknown or unsupported macos version dunno
brew update-reset
brew 国内安装
iFunBox 同步iPhone文件到Mac
iFunBox,可以查看安装应用的共享日志文件
Fastbot_iOS
Xcode版本
xcodebuild -version查看xcode版本信息
设置开机启动项
参考——
- 生产可执行的shell脚本
- 显示简介 中将打开方式修改为 终端
- 系统设置 – 用户与群组 – 登录项 添加自定义的脚本
MacOS > 13.4: 设置 -- 通用 -- 登录项
Xcode.xip删除验证
sudo xattr -d com.apple.quarantine Xcode.app
Operation not permitted
权限控制问题,在设置–安全和隐私–完全磁盘访问权限中将对应的程序添加即可。
某沙盒应用被删除后,还有遗留的空文件夹一直无法删除(在应用程序中遗留了空文件夹;/usr/local/lib/xxx 路径也存在一个空文件夹),提示上述错误。
给term添加权限之后依然报这个错误。关闭了SIP设置:重启–> Command +R 进入恢复模式 –> 进入Terminal –> csrutil disable –> 重启
重启之后依然报相同的错误。最后发现,第一步的列表中也有一个沙盒应用的“系统扩展”应用也存在这个权限。右键找到对应路径,删除文件;同时关闭这个权限,再重启电脑。然后对应遗留的文件终于可以删除。
Xcode清除 Report Navigator中的logs信息
关闭Xcode,删除文件夹 rm -fR ~/Library/Developer/Xcode/DerivedData,重新打开Xcode
provisioning profile
What is a provisioning profile & code signing in iOS?
苹果要求必须签名后的应用才能安装到设备上,但开发阶段如何处理?这就是 provisioning profile 的作用,作为【开发者账户】和【设备】之间的纽带存在,完成“谁开发的什么应用要安装到哪些设备上”的问题?
所以这个文件包含了三个部分——
- 证书文件 Development Certificates 来自开发中账户,证明“who”的问题,通常包含一年的有效期
- 设备列表 Unique Device Identifiers
- AppId 相当于包名,可以使用wild card模式支持一组app;对应于应用的 bundle identifier
另外还有基础的描述部分,和权限列表(Entitlements)
这个文件可以从开发中账户下载并切要打包到应用中,安装时设备将进行检查。
.p12 本地私钥,可以从Keychain Access导出并导入到其他电脑。iOS平台上的签名过程可以参考下图——

证书个数限制
个人证书类型可以创建 3个 证书;企业证书 可创建 100 个证书。bundleId可以任意创建,确保全球唯一即可,不同的证书无法创建相同名称的bundleId
iOS证书签名原理分析 解释了下面的过程,实操演示。
Generate a Certificate Signing Request (CSR): In the Apple Developer Portal, navigate to Certificates, Identifiers & Profiles. Under Certificates, select the appropriate certificate type (e.g., Development, Production). Follow the instructions to generate a CSR file. This step is usually done when creating a certificate signing request for a development or distribution certificate.
Obtain a Certificate from a Certificate Authority (CA): Submit the CSR file to a trusted Certificate Authority (CA), such as Apple, to obtain a digital certificate. The CA will verify your identity and issue the certificate, which is often in .cer format.
Import the Certificate into Keychain Access: Double-click the .cer file to import it into Keychain Access on your macOS system. The certificate should appear in the “login” keychain.
Export the Certificate with Private Key as a .p12 file: In Keychain Access, locate the certificate with the associated private key. Usually, it will have your name or the App ID associated with it. Right-click on the certificate, select “Export”, and choose a password for the exported .p12 file. Save the file to your desired location.
使用Xcode安装ipa到手机
- 确保ipa已经正确打包
- 打开Xcode,连接iPhone
- 打开Window -> Devices and Simulators (快捷键Shift + Command + 2)
- 把ipa文件拖拽到下图位置。或点击+选择ipa文件
Archive
苹果开发者账号开启双重认证教程 注册Apple账户且在iOS设备上进行登录(Phone or Pad),在账户信息页面选择 “密码与安全性”,开启双重认证。——目前,不开启双重认证的账户无法注册为开发者账户。
开发者账户申请 开启账户双重认证后,注册开发者时,可以选择短信方式进行验证。填写完所有必要信息后,会先收到订单确认信息,但需要等等审核通过。9号11:14申请开发者账号,10号14:00申请通过。
快的话付款后十几分钟后就能用,一般要审核一两天,有可能会发邮件让补充地址信息或者上传身份证,留意好邮件就行了。
…develop your application…
iOS开发之App打包上传详细步骤 其中第三方上传工具可以使用app-specific的密码 Using app-specific passwords
Apple disk space issue
System Storage taken too much space
存储空间只有3GB可用,频繁提示“空间不足”且这个提示无法禁止。——最终只能暂时打开勿扰模式。
查看系统占用近70GB。根据这个视频说明实际是正常的。这个占用实际上包括了:System + Library(system + user)。这样可以查看这三个对应的文件夹到底哪些应用占用了大量空间。例如:删除Android sdk下载的多个platform之后,就释放了7GB左右的空间。
Other volumns,容器中的其他卷:What is ‘Other Volumes’?
You can list these with diskutil apfs list. The standard configuration of such a container is as follows:
- disk1s1, the volume you boot from, mounted at /, shown in Disk Utility as Macintosh HD
- disk1s2, ‘Preboot’, not mounted, hidden
- disk1s3, ‘Recovery’, not mounted, hidden
- disk1s4, ‘VM’, mounted at /private/var/vm, hidden
The last 3 are grouped as Other Volumes in Disk Utility. They’re required by macOS and shouldn’t be removed.
128G SSD的痛
看起来过一段时间就得做一下类似的动作了。
- 赋予命令行程序iTerm全局访问磁盘的权限,否则sudo 提示 operation not permitted。“System Preferences –> Security & Privacy –> Full Disck Access”
- 查看各个目录占据的大小排行,在根目录下:
sudo du -sh * | sort -hr
然后发现下面的情况。反正已经重启了,先任性把Caches都干掉了(还是先看了一眼里面的内容,初步判断没有问题)。
➜  ~ sudo du -sh * | sort -hr
Password:
 51G	Library
2.9G	projects
574M	GoProjects

// User's Library
➜  Library sudo du -sh * | sort -hr
 20G	Containers
9.9G	Developer
9.1G	Caches

//System Library
➜  /Library sudo du -h -d 1 | sort -hr
Password:
7.7G	.
5.0G	./Developer
662M	./Desktop Pictures
然后发现Containers里的内容就一个Docker的Disk image location就占据了19.8GB的大小。搜索了一圈,很多128GB的Mac用户都深受其苦。
- 删除了不用的容器
docker container prune - 删除了不用的镜像
docker image prune - 净化了docker对象
docker system prune,宣告了Total reclaimed space: 4.36GB,但实际还是没有变小。
按照官方指导操作一遍,还是没啥效果。官方 #issue 371下讨论了很长篇幅。采用高票意见
docker rm $(docker ps -a -q)
docker rmi $(docker images -q)
docker volume rm $(docker volume ls |awk '{print $2}')
rm -rf ~/Library/Containers/com.docker.docker/Data/*
其实最后一步还是直接将原始的Disk image删除了。运行中的Docker直接报错,只好选择“恢复出厂值”——出厂值大小目前为2.3GB
Mac允许远程登录
系统–共享–远程登录
Mac多台电脑共享屏幕
原生支持。多台Mac设备在相同的局域网内,系统设置 – 共享 – 屏幕共享(也可以选择其他共享的内容)
Finder中选择 网络 – 找到打开共享的机器,选择“共享屏幕”。
获取app的下载链接
在Apple store找到对应App,点击更多,选择Share App,有 Copy link选项。可以获取到对应App的下载链接
google paly上可以web端搜索对应的app,获取到url,然后可以到apkpure网站获取下载地址。
更改主机名,新建删除账户
Change your computer’s name or local hostname on Mac
On your Mac, choose Apple menu > System Preferences, then click Sharing. Open Sharing preferences for me.
Type a new name in the Computer Name field. You may need to click the lock icon and provide an administrator name and password before you can change the name.
Apple menu > System Preferences, then click Users & Groups
新建管理员账号,使用新建管理员账号删除另外一个管理员账号
升级15版本后,XCODE无法打开
提示类似:Error Domain=PKInstallErrorDomain Code=102 "The package “XcodeSystemResources.pkg” is untrusted."的错误。
Edit and set the date of your Mac as October 1st, 2019.
提示其他package的untrusted问题也使用修改日期的方式来解决。
快捷键 锁屏
系统自带锁屏快捷键:Ctrl + Command + Q 注意:QQ的快捷键和这个有冲突,需要修改QQ的快捷键。
Control–Shift–电源按钮 将显示器置于睡眠状态。
Option–Command–电源按钮 将您的 Mac 置于睡眠状态
制作ubuntu启动盘
- 应用->其它->磁盘工具
- 选择U盘,然后擦除
- 选在格式: MS-DOS (FAT)
- 打开Etcher
- 选择Ubuntu镜像文件
- 选择U盘
- 点击“Flash”刻录
使用命令行制作, Mac 制作 Ubuntu 18.04 启动盘
cd Downloads/
# 1. 制作系统.img
hdiutil convert -format UDRW -o ubuntu.dmg ubuntu-18.04.2-desktop-amd64.iso
# 找到U盘挂载的目录
diskutil list
# 取消 U盘 的挂载(但是不要拔掉)
diskutil umountDisk /dev/disk5
# 制作启动盘
mv ubuntu.dmg ubuntu.iso
sudo dd if=./ubuntu.iso of=/dev/disk5 bs=1m
XCode 更新更换账号
How to update Xcode with a new Apple ID?
XCode安装时使用到时旧ID;后续App Store更换了新ID,XCode更新时提示还是使用到旧ID。
- Open Finder and navigate to Applications,
- Ctrl+Click XCode and choose “Show Package Contents”,
- Expand the Contents directory and click _MASReceipt to select it,
- Type Command+Delete to delete the directory permanently—you will be prompted for your credentials since this is a protected file.
brew install local file
How to install a local file in Homebrew
How to use Homebrew to install local archive
# download your archive
wget https://github.com/zeromq/libzmq/releases/download/v4.3.2/zeromq-4.3.2.tar.gz

# move the archive to your brew --cache
mv zeromq-4.3.2.tar.gz $(brew --cache)

# then install the archive as normal
brew install zeromq
使用brew cat zeromq查看zeromq的下载地址
xip format
A XIP file is analogous to zip file, but allows for a digital signature to be embedded and be verified on the receiving system, before the archive is expanded.
To verify that a package is signed, execute the following command on a computer with the package:
pkgutil –check-signature /path/to/package.pkg
If the output is “Status: signed by a certificate trusted by Mac OS X”, the package is signed. If the output is “Status: no signature”, the package is not signed.
Right-Click and open with Archive Utility from Finder.
运行多个Xcode版本
Running Appium with multiple Xcode versions installed
显示当前版本:xcode-select --print-path
更换版本 sudo xcode-select --switch /Applications/Xcode-beta.app/Contents/Developer
Mac使用brew安装python3
install python3 on Mac
Permission denied
brew install python3
# 有可能出现文件夹不存在的错误和权限异常,brew会自动给出提示,安装提示进行赋权即可
sudo mkdir /usr/local/Frameworks
sudo chown $(whoami):admin /usr/local/Frameworks

#报错
Permission denied @ dir_s_mkdir - /usr/local/Frameworks

# do
brew link python
python3: Virtual Environments
- python3 内置虚拟环境 venv 模块
- 定义虚拟环境所在目录,如
~/.virtualenvs - 新建一个虚拟环境目录
python3 -m venv ~/.virtualenvs/firstenv - 激活这个虚拟环境
source ~/.virtualenvs/firstenv/bin/activate - 退出虚拟环境
deactivate或关闭命令行即可
激活时,可使用 pip freeze查看虚拟环境下的所有已安装软件
➜  ~ mkdir .virtualenvs
➜  ~ python3 -m venv .virtualenvs/firstenv
➜  ~ source .virtualenvs/firstenv/bin/activate
(firstenv) ➜  ~ pip freeze
(firstenv) ➜  ~ deactivate
查看MacOS版本
➜ sw_vers -productVersion
10.14.6
➜ sw_vers
ProductName:	Mac OS X
ProductVersion:	10.14.6
BuildVersion:	18G87

# Generates a text report with the standard detail level.
system_profiler SPSoftwareDataType

# 查看Mac序列号
system_profiler SPHardwareDataType
Could not locate device support files.
support files address: /Applications/Xcode.app/Contents/Developer/Platforms/iPhoneOS.platform/DeviceSupport/xxversion
brew 安装提示Xcode outdated
Error: Your Xcode (10.1) is too outdated. Please update to Xcode 10.2.1 (or delete it). Xcode can be updated from the App Store.
Open the file /usr/local/Homebrew/Library/Homebrew/extend/os/mac/diagnostic.rb , then delete this line check_xcode_minimum_version in the following function.
def fatal_build_from_source_checks
    %w[
      check_xcode_license_approved
      check_xcode_minimum_version
      check_clt_minimum_version
      check_if_xcode_needs_clt_installed
    ].freeze
    end
Mac功能键
设置、键盘、勾选功能键选项
Chrome全屏 Command+Shift +F
brew 安装应用的地址
#don't update brew and
HOMEBREW_NO_AUTO_UPDATE=1 brew install -s pkg-config

#

# brew install hugo
# https://discourse.gohugo.io/t/hugo-homebrew-update-for-osx/82
brew update
brew install hugo

# 安装的路径:/usr/local/Cellar/hugo/
强制退出程序
使用快捷键:Command+Option+Esc 打开强制退出程序窗口,然后选中你需要退出的程序,再点右下方的“强制退出”即可。
美区账户注册之路
使用一枝红杏出墙来里提到的AgentNEO服务,可以在Mac、Windows、Android设备上自由出入。
但iPhone上使用这个服务需要:先用美区账号登录,付费购买支持的软件Shadowrocket(2.99)、Quantumult(4.99)、Kitsunebi(4.99)才能使用。这不变成了鸡(生蛋)蛋(生鸡)问题了嘛。
只能先曲线救国了,先注册美区账号再说。这里有官方教程:Create or use an Apple ID without a payment method、How to create a new Apple ID
注册账号
- 挂上美区的IP地址,访问whatismyipaddress.com检查当前网络IP是否正确
- 访问https://appleid.apple.com开始注册,上一步正确的话,这里可以看到注册时默认是美区账号
- 填写密保问题、有效邮件地址(尽量使用gmail、hotmail等国外服务的邮箱)。然后激活邮件(因为是电脑端访问,所以正好直接打卡邮件激活)
激活账号
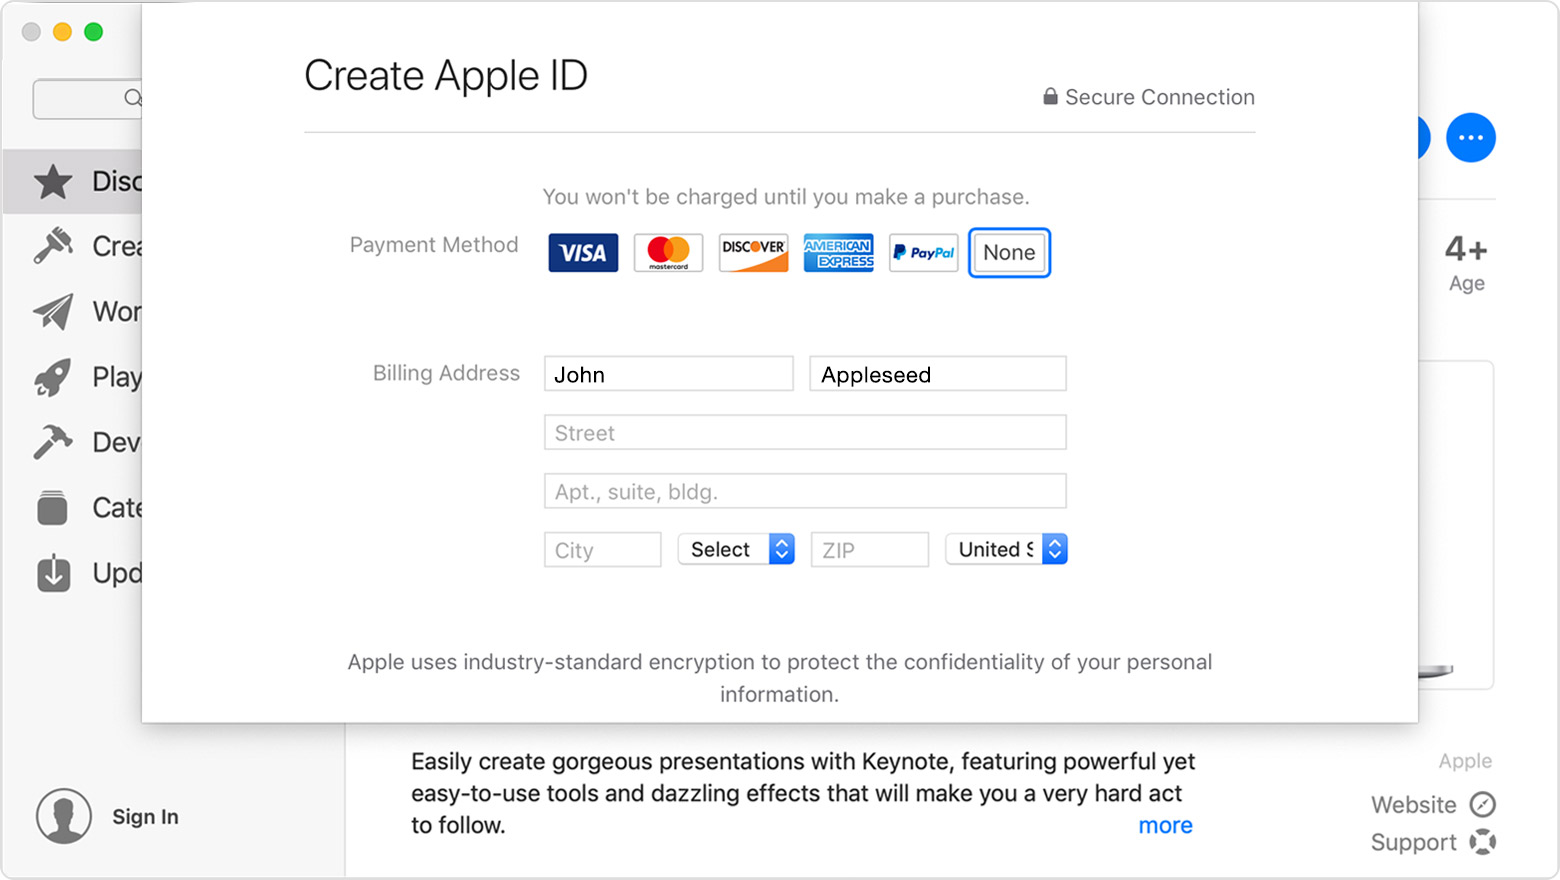
注册成功后,从https://appleid.apple.com登录,填写账单地址和支付方式(支付方式选择为None)、手机号码
如果不使用美区IP,注册的时候可能无法选择None选项,参考这里If you can’t remove your last payment method or use no payment method with your Apple ID
工具:美国地址http://haoweichi.com/、生成随机假地址,或者利用google map选择一个你的ip地址(通过第一步可以看到大概位置)附近的生活区域的地址
使用虚拟手机号接受短信 SMS Receive Free,不一定必须收到短信,这里可以看到有效的手机号码,或者google搜索
disposable number获取有效的手机号。需要真实的号码,可以参考这个攻略
使用账号
账号注册成功后,首次在App Store使用时会走一遍review流程(同意协议、确认付款方式)。可以下载一个免费的应用走这个流程。
在下面这个确认付款方式页面时,一直提示For assistance, contact iTunes Support at www.apple.com/support/itunes/ww/.
一些无效的尝试
绑定国内的双币信用卡、尝试注册美版Paypal(实践上难度更高)、iPhone设备上使用国内的wifi走流程(干脆就没有None选项)、iPhone设备上使用美区IP走流程(依然无效)
以上操作耗费了更多的精力,但都没有成功。最后老实进行反馈吧(尽管有点心虚)。
- 访问 www.apple.com/support/itunes/ww/选择Unite States地区,进入 iTunes页面:https://support.apple.com/itunes,选择右下角都 get supports链接,选择问题类型,描述问题,提供反馈邮箱,提交反馈。

- 运气不错,大概两小时后,收到反馈(反馈时间也正好是美区的工作时间端),官方后台做了操作,让我再次走下流程。

Android共享代理
上面的无效尝试也并非没有成果,搜到这篇借助Proxy Server实现Android设备免root共享VPN连接文章,尽管评论说v2rayng无效,还是尝试了一下我的。
- 从google play搜索下载proxy server
- Android、iPhone设备使用相同的局域网
- Proxy Server根据说明操作,必须的是指定端口,启动后在Info栏可以看到IP
- iPhone端的无线链里的代理修改为手动,使用上一步的IP+端口
- iPhone端使用浏览器访问whatismyipaddress.com检查当前网络IP是否正确
挂上相同的代理,iPhone端从App Store下载一个免费的App,走到确认支付手段的地方,选择None选项(如果使用国内的wifi,是没有None选项的;如果使用国内信用卡,也始终无法通过Next),Next终于成功。
首次走完上面的流程之后,再次使用就不需要必须使用美国IP了,因为不需要再走激活流程。付款方式采用none之后,可以使用礼品卡进行充值,可参考这篇文章关注一下注意事项。
访问礼品卡页面,直接按照流程操作即可。
- 两个有效有效(送礼人、接收人)
- 一个有效美国地址(作为付款但账单地址)
- 使用Guest方式支付(可以使用国内的双币信用卡)
大概4小时之后可以收到,官方承诺的为24小时发货。
